How to Get My Nvidia Control Panal Up Again
How to Fix a Missing NVIDIA Command Panel in Windows eleven and ten
The NVIDIA Control Console is essential for tweaking your graphical settings, and so if it decides to hide from you, here'due south how to bring it back.
The NVIDIA Control Panel includes a slew of settings for NVIDIA graphics cards. Users can configure graphical settings for games and software from there. So, it'due south a pretty important app for users with PCs that have NVIDIA GPUs.
Some users take reported a curious issue in which the NVIDIA Control Panel disappears in Windows 11/ten. Users can't find that app on the desktop context carte du jour, inside the arrangement tray, or in the Windows Control Console when that effect arises. Consequently, they can't access that app. This is how y'all tin fix a missing NVIDIA Command Panel in Windows 11/10.
1. Check and Enable all NVIDIA Services
The missing NVIDIA Control Panel outcome can arise because sure NVIDIA services are disabled. Thus, enabling and starting all NVIDIA services is one way you might be able to restore the missing graphics panel in Windows eleven/10.
Hither is how to enable NVIDIA'south services:
- Correct-click the Get-go menu button to open up a Power User carte du jour, and select the Run shortcut there.
- Type services.msc in the Open up box and click OK to bring up a Services window.
- Roll downwardly the window to the NVIDIA services as in the snapshot straight below.

- Then double-click any NVIDIA service listed in that location.
- Select the Automatic choice on the Startup type drop-downwardly menu for the service.
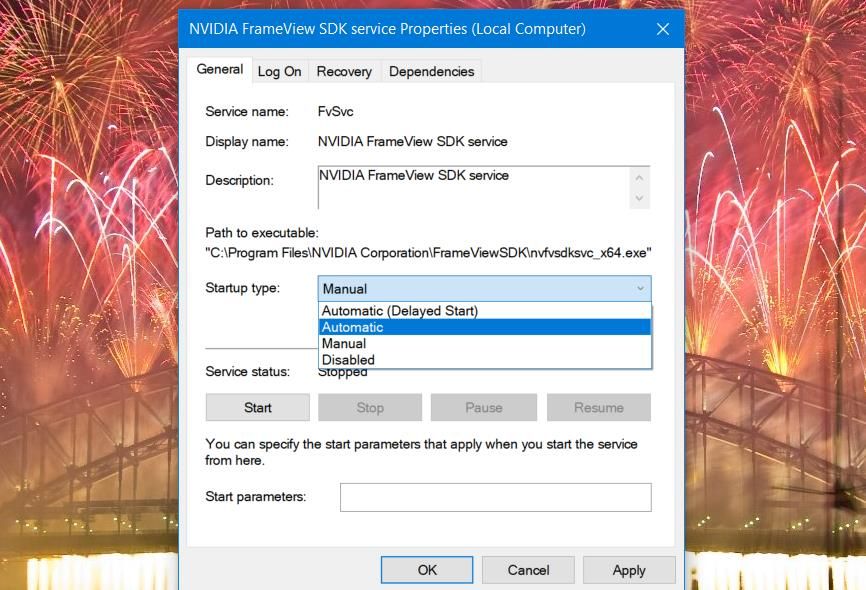
- If the service isn't running, click the Start button.
- Select the Apply option to save the NVIDIA service settings.
- Click OK to shut the service properties window.
- Repeat steps four to eight for all listed NVIDIA services.
- Restart your PC after changing NVIDIA service settings.
2. Update Your NVIDIA Graphics Card'southward Driver
Equally the NVIDIA Control Panel is intimately linked with its graphics card, information technology tin can go missing because of an outdated or incompatible NVIDIA driver. Therefore, it's recommended that you update your NVIDIA graphics card's driver if information technology'southward outdated. You can do that manually or with tertiary-political party driver updater software.
This is how you can manually update a driver for an NVIDIA graphics card.
- Open up the DirectX Diagnostic Tool.
- Click the Brandish tab there to view details for your NVIDIA graphics card. There you can see the date and version details for the driver to check if it needs updating.
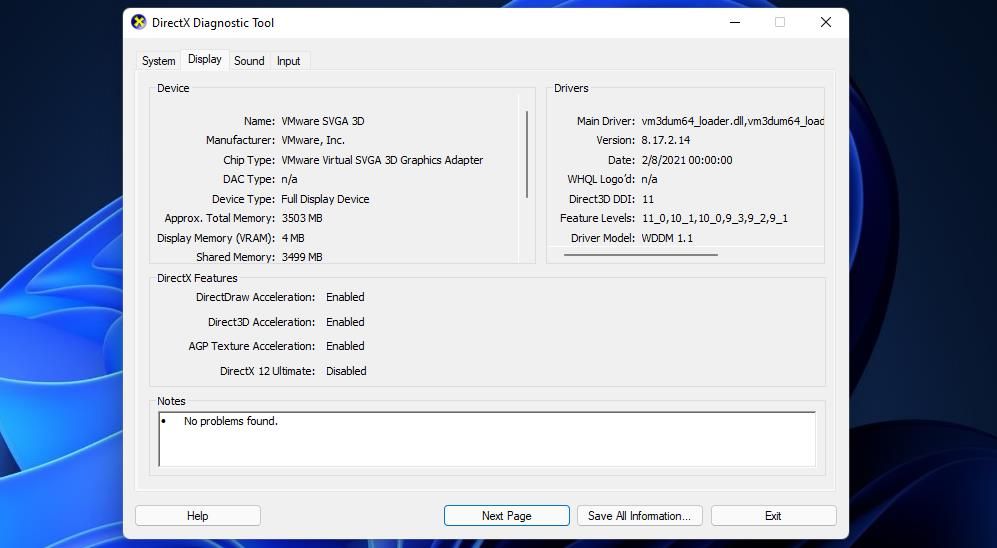
- Annotation downwards the graphics card model particular on the Brandish tab.
- Open the NVIDIA driver download page in a browser.
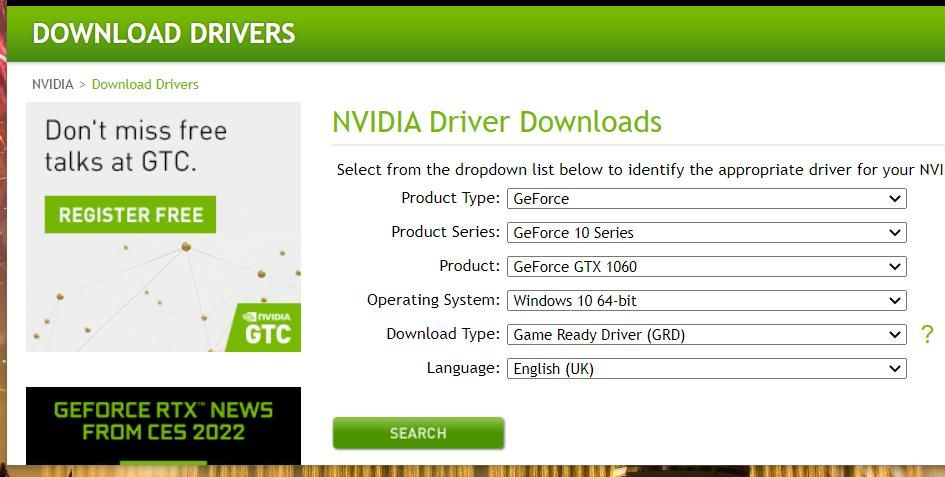
- Select your graphics carte'southward series and model on the drop-down bill of fare.
- And so select your PC's platform in the Operating System drop-down menu.
- Press the Search button.
- Click the Download button for the latest NVIDIA driver parcel.
- Open File Explorer and the folder that includes the downloaded driver parcel.
- Right-click the NVIDIA commuter package to select Run equally administrator.
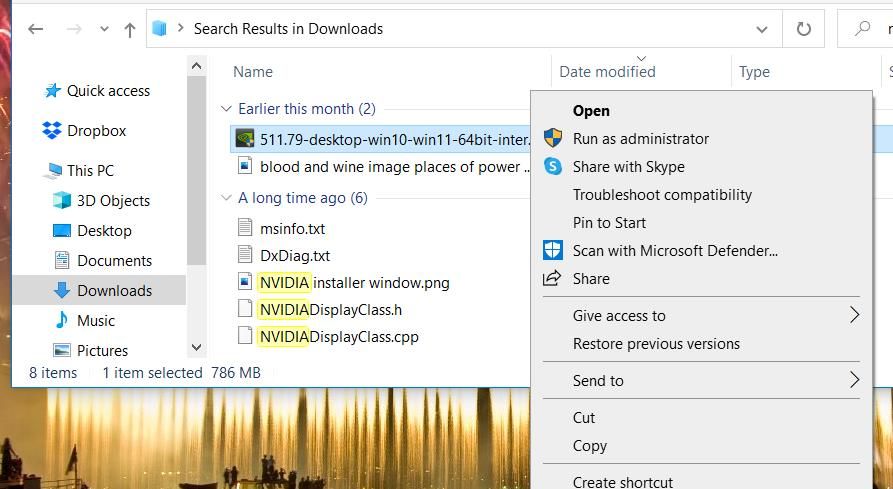
- Click OK on the Extraction path window that opens.
- Select the NVIDIA Graphics Driver radio button in the NVIDIA Installer window that opens.
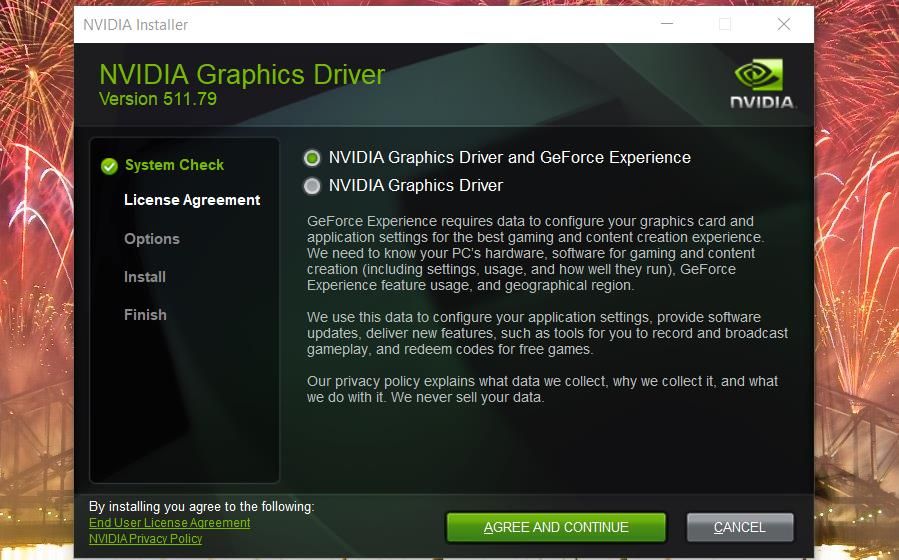
- Press the Agree and Continue push button.
- Select the Express (Recommended) choice, and click Side by side to install.
- Click the Restart Now option to stop.
iii. Reinstall Your NVIDIA Graphics Card's Driver
If your NVIDIA graphics carte already has the latest driver, try reinstalling its driver instead. This is how you can reinstall an NVIDIA GPU'southward driver.
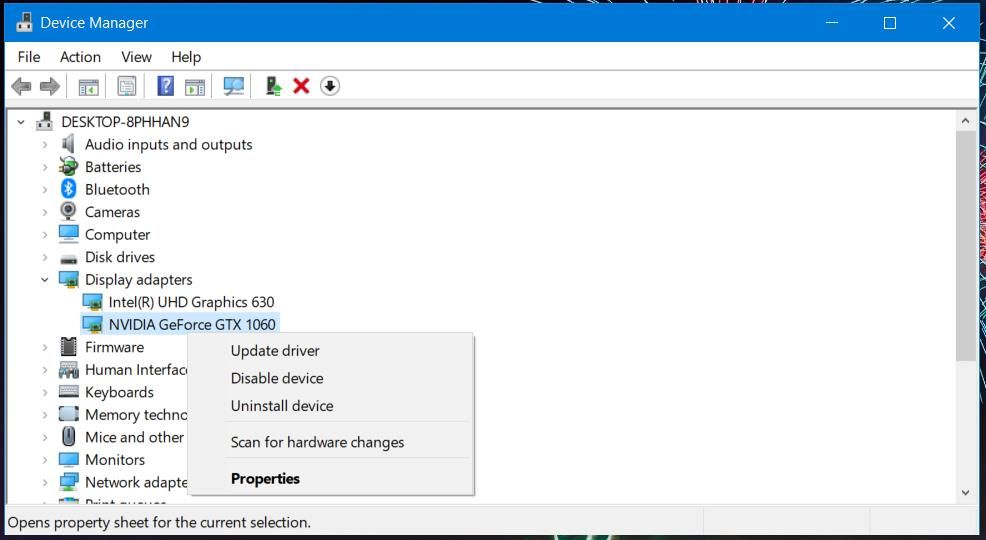
- Open up the Power User menu, and select the Device Manager option on it.
- Double-click the Brandish adapters category to view its devices.

- Right-click your NVIDIA graphics carte du jour there to select an Uninstall device option for it.
- Select the Delete the driver software for this device option on the confirmation prompt that pops upwardly.
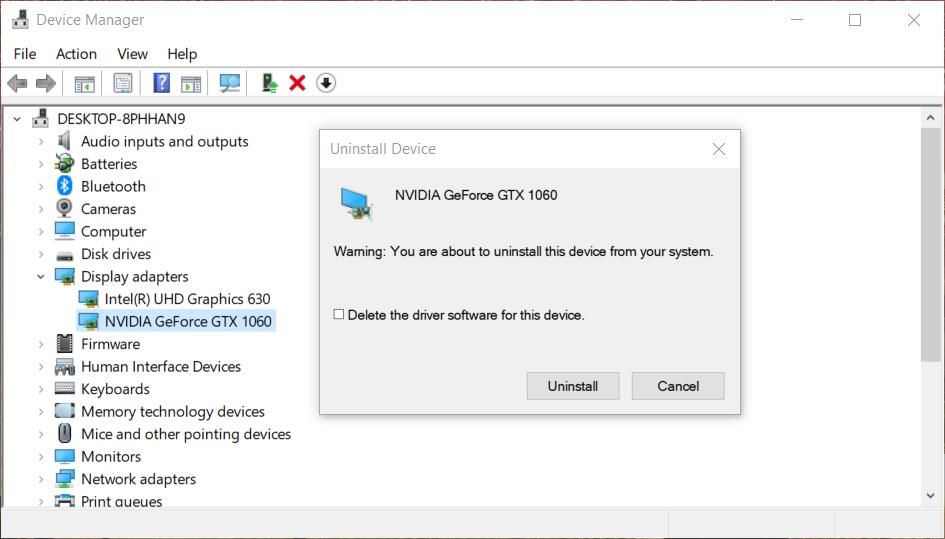
- Click the Uninstall push there to provide confirmation.
- Restart your PC.
- Download and install the latest NVIDIA commuter package for your graphics carte du jour as outlined for the previous resolution.
4. Try Opening NVIDIA Command Panel From File Explorer
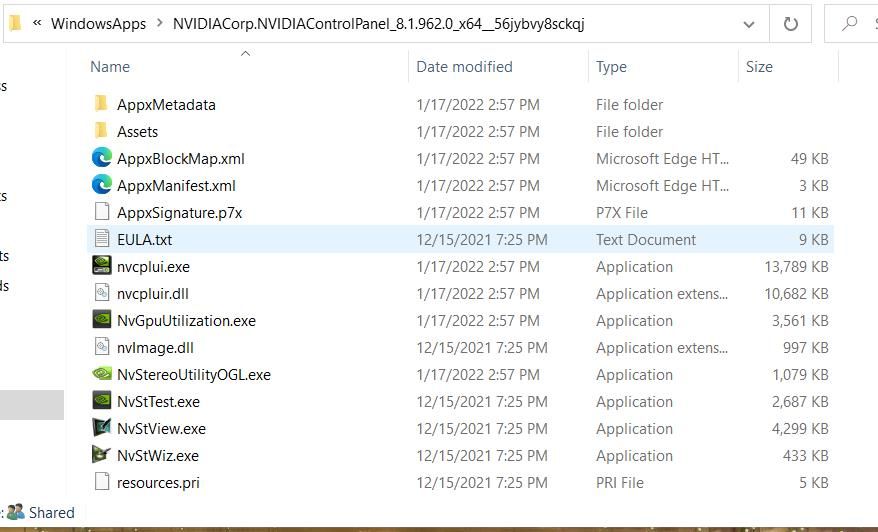
Try looking for the NVIDIA Control Panel within File Explorer. The specific file for opening the Control Panel to await for at that place is nvcplui.exe. If you can find nvcplui.exe in Explorer, you can and so attempt opening it from there. These are different folder paths you'll demand to look for the nvcplui.exe file in:
- C:\Program Files\NVIDIA Corporation\Control Console Client
- C:\Program Files\WindowsApps\NVIDIACorp.NVIDIAControlPanel_8.1.962.0_x64__56jybvy8sckqj
If you tin't notice the Control Panel Customer folder, then nvcplui.exe is probably inside the WindowsApps binder path specified to a higher place. However, WindowsApps is not a readily accessible folder. You'll need to have ownership of that binder to open up it. Yous tin take ownership of that folder with one of the software packages in MUO's "Take Buying of Windows x Files and Folders" guide.
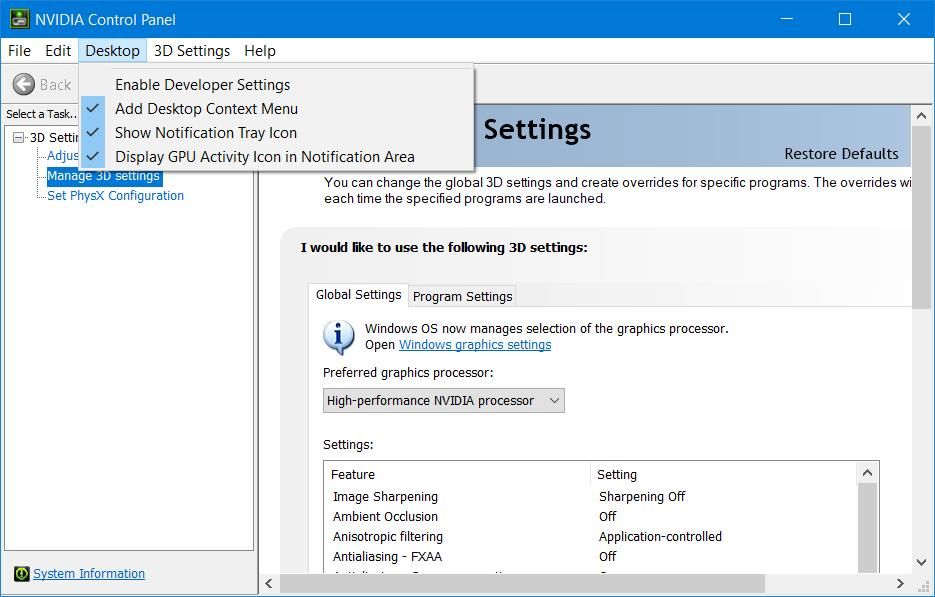
If you discover the nvcplui.exe file in Explorer, right-click it to select Run every bit administrator to open up NVIDIA Control Panel. And so click Desktop at the top of its window. Select the Add Desktop Context Bill of fare and Show Notification Tray Icons options to restore it on the organisation tray and desktop context menu.
5. Copy the NVDisplay.Container file Into the Startup Folder
"NVDisplay.Container" is the NVIDIA Brandish Container LS service's file. Adding that file to the Windows Startup folder can also fix a missing NVIDIA Control Console. Hither is how yous can re-create that file into the Startup folder:
- Open up the Services window every bit outlined in steps one and two of the first resolution.
- Double-click the NVIDIA Display Container LS service to open its window.
- Copy the path to the executable specified in that window with the Ctrl + C hotkey.
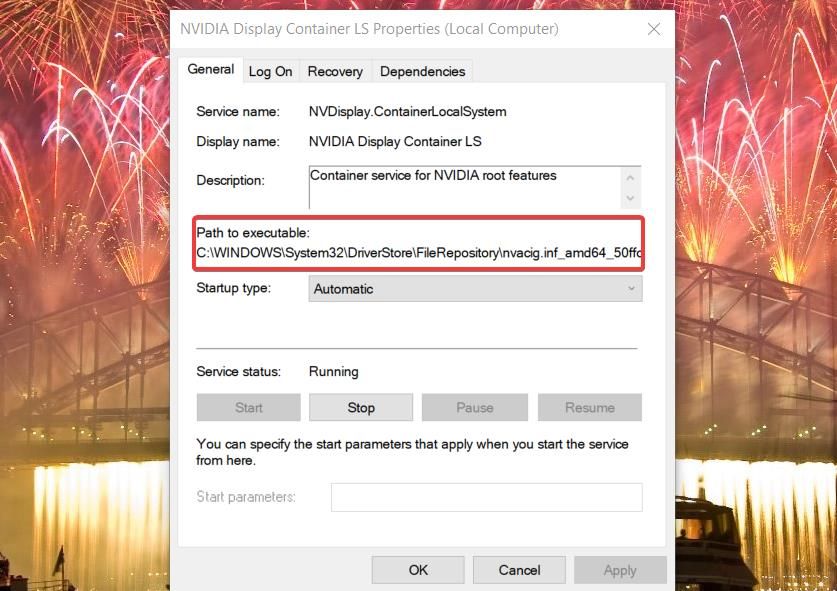
- Click OK to leave the properties window, and shut the Services app.
- Bring up File Explorer, and select the C: bulldoze.
- Paste the copied path into the folder address bar with the Ctrl + V hotkey, and press the Enter key.
- Then right-click the Display.NvContainer file to select the Copy option on its context menu.
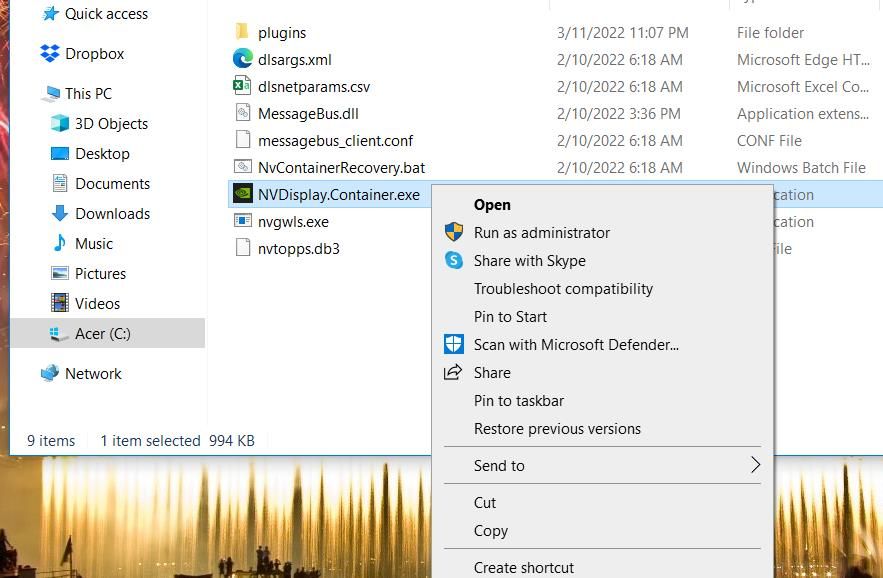
- Open up the Run accessory, and type shell:startup in its Open up box.
- Right-click within the Startup folder to select the Paste shortcut option.

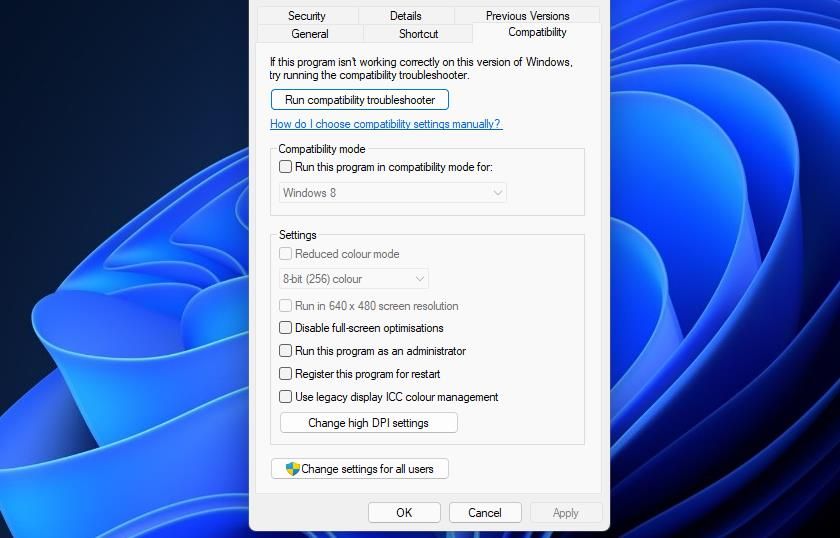
- Next, click Display.NvContainer file with your right mouse button and select Backdrop.
- Select Run every bit administrator on the Compatibility tab shown directly below, and click the Apply button.
- Finally, restart your laptop or desktop.
6. Reinstall the NVIDIA Control Panel
As a last resort, endeavor reinstalling NVIDIA Control Panel. You can reinstall the NVIDIA Control Panel by uninstalling it via Settings as follows.
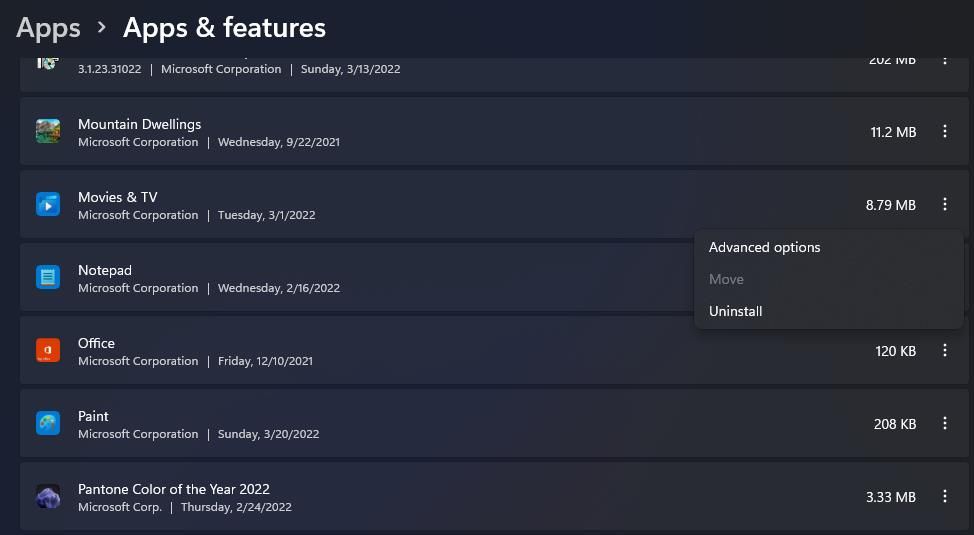
- Open Settings in Windows.
- Then select Apps > Apps & features to bring upwardly a list of installed software.
- Find the NVIDIA Command Panel app listed at that place, and click its three-dot button.
- Select the Uninstall pick for NVIDIA Command Panel.
- Restart your PC subsequently uninstalling the NVIDIA Control Panel app.
- Click the pinned Microsoft Store app shortcut from the Offset menu.
- Blazon NVIDIA Command Console in MS Store's search box.
- Select NVIDIA Command Panel in the search results.
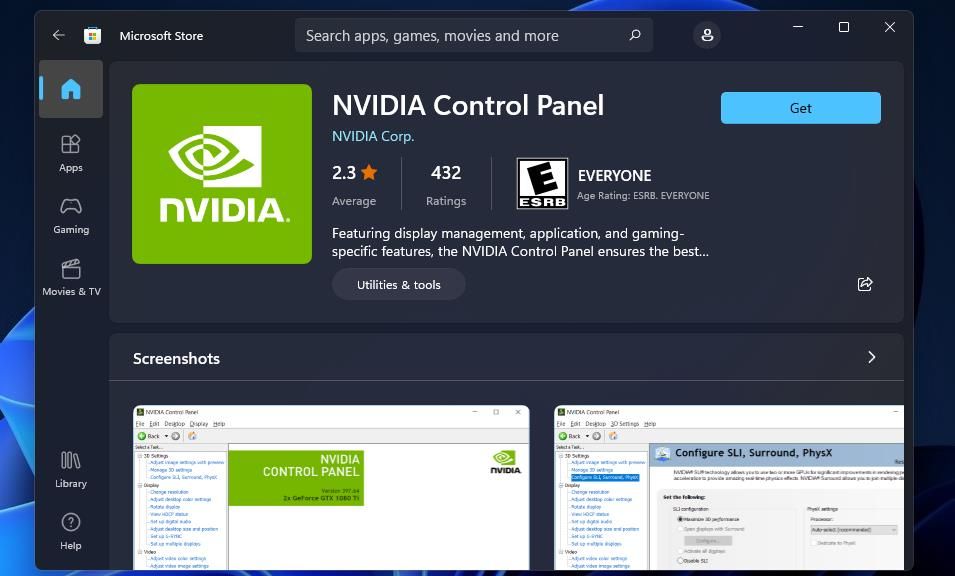
- Printing the Get button to reinstall the app.
Restore Your NVIDIA Command Console With Those Fixes
Although yous tin can configure graphical options in games, it'south amend to employ universal settings via the NVIDIA Control Panel. You can restore your missing NVIDIA Control Console in Windows 11 and 10 by applying the potential fixes to a higher place. And then you lot'll be able to access and alter the graphical settings in that location as required once again.
Most The Author

Source: https://www.makeuseof.com/windows-11-10-missing-nvidia-control-panel/
0 Response to "How to Get My Nvidia Control Panal Up Again"
Postar um comentário